How to re-cover a wheel
There comes a time when the PVC coating on a wheel becomes worn and possibly the iron is even showing through at the bottom. The wheel gets wobbly and difficult to control. It is time to give it a new PVC covering.
This is a description of how I did it. If anyone who has done it has any tips or suggestions, please email me and I will add your comments to this page.
![]()
The operation consists of 4 stages
Materials required
![]()
The job will be made very much easier if it is warm. I started the job in a cold October in England and the PVC was like rock and very difficult to get off. The method I used was as follows:-
 |
First I suspended the wheel horizontally from the garage roof and I then cut along the seam on the inside of the lower rim with a hooked knife. |
 |
I then levered The last section of wheel I did on a sunny day in the conservatory (by kind permission of the management !). The temperature was well into the upper 20s and the PVC could easily be pulled off by hand. |
![]()
It is very important that the steel rims are clean and totally free from old glue, rust grease or other dirt. Parts of my wheel were very rusty under the PVC. In order to clean the rims I used three methods
| Scraping with a steel scraper (an old file ground to a square end is ideal) | |
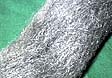 |
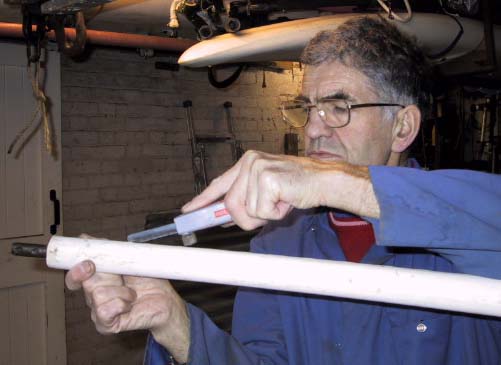
A thorough clean with coarse steel wool soaked with cellulose thinner. (you must do this in a well ventilated place outside, away from any naked flames or sources of heat and wearing thick plastic gloves). |
| Rub with coarse emery or sandpaper to leave the rims bright but slightly scored to give the glue a better key to the metal. |
If you need to re-paint the handles and rungs, now is a good time to do it.
![]()
| Before you start you will need | a) glue and a narrow stiff bristled bush to apply it with. |
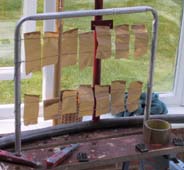 |
b) some pre-cut lengths of packing tape (I used a frame with wires across it to hold these) |
picture to be added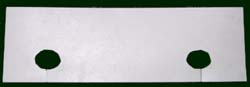 |
c) to make a template for cutting the PVC where it passes handles, I made this from a bit of vinyl flooring |
With a sectioned wheel, you can start at the end of any section, but I suggest you start with a side section as it is easier (only 1 rung and no handles). With a 1 piece wheel you should start inside one of the outer handles (rim handles).
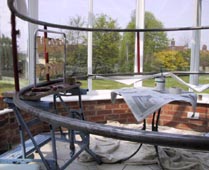 |
Position the wheel on its side at a convenient working height, supported so that a reasonable amount of the lower rim is available to work on. If it is a sectioned wheel, I found it best to fit the sections together, but do not push the pins fully home, leave a cm or so gap at each joint. I supported a length of PVC strip using removable plastic ties, you can just see these in the picture at the back. |
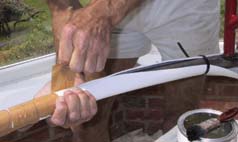 |
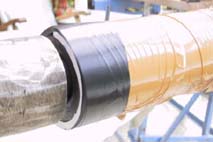
Put a thin and even coat of glue on the wheel rim, about 30 cm at a time. Also put a thin coat onto the PVC, then immediately press the PVC onto the rim, ensuring that the joint is really tight, and fix it with strips of packing tape. The joint should be on the inside of the rim (facing the other rim). With practice you will be able to increase the length glued each time, but start small. |
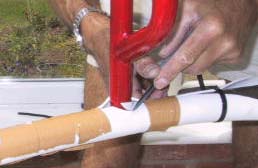 |
When you pass a rung, tape the PVC as tight as possible either side of the rung, then using a hooked knife, cut the edges of the PVC to make a snug fit round the rung. |
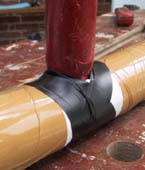 |
tape diagonally round the rung to ensure a close joint |
|
|
Use extra tape to ensure a tight fit at the end of a section. Remember to remove the screws in a sectioned wheel before you glue the PVC over the screw holes |
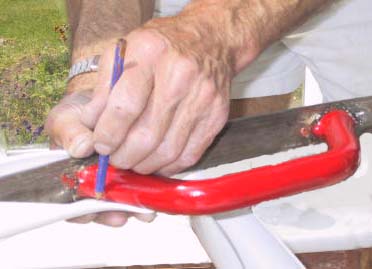 |
When you get to a rim handle, glue as far as possible and then mark the position of the handle on the back of the PVC |
| picture to be added | Now use the template (see start of this section) to mark the pvc before cutting out the required shape |
| Glue the rim and the PVC and tape tightly in the same manner as for a rung |
With a sectioned wheel, clear the PVC from the screw holes as follows:-
| press the PVC with your thumb to detect the position of the holes | |
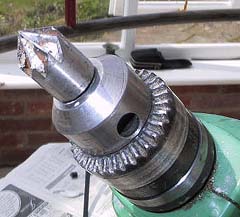 |
Carefully use a countersink to cut a hole. The countersink will center itself to the hole in the rim, but be careful not to damage the thread. |
The tape needs to be left on the wheel for a couple of days, after which it can be carefully removed
I used the same pieces of tape for the second rim. After a couple of days I turned the wheel over, losened several pieces of tape and then transfered them directly to the other rim as I glued it.
Once the glue is all dry and the tape removed, the wheel can be used, but if you want to make a really good job of it you need to weld the join in the PVC.
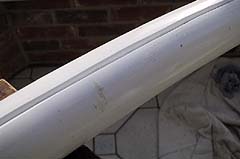 |
After untaping the wheel, use a hooked knife to cut a V shape along the join in the PVC |
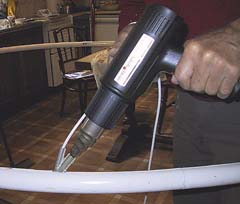 |
Now use a hot air gun with the special PVC welding attachment to fill the V shaped cut with PVC filler cord. The hot air gun must be one with thermostatic control and needs to be set at about 250 deg C. With a little practice you can move the gun at a steady speed and get a good weld.. |
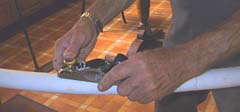 |
Finally you need to remove any excess weld. This can be done with a block plane, then a coarse file, and finished with sandpaper. |